300Tdi low coolant alarm
In the 300Tdi engine, the water pump is located quite high in the engine (near the cylinder head). A relatively small loss of coolant can result in the pump sitting high and dry and the engine overheating. Typical causes of coolant loss can be ruptured coolant tanks, head gasket failure, pipes bursting or radiator leaks. This can be a real threat if you're working the cooling system to the max on expedition in a hot country.
In Belize, one of our Defenders had had two previous occasions where the coolant had completed drained; first due to a hole in the heater matrix (which was then bypassed) and second because of a split pipe. These had left the cylinder head warped and requiring skimming and resulted in numerous problems with the top end over several years. The engine was gutless and couldn't go any faster than 100kmh (60mph) even though it was only 4 years old and had done 140,000km (87k miles). All of this could have been prevented by stopping the vehicle once it was known that the coolant level was too low.
In the UK, when the radiator on my 200Tdi sprung a leak on the motorway, it was only because the leak sprayed forwards and was blown back over the bonnet that I knew that there was a problem!
Later models such as the Tdci have inbuilt safety systems. In Botswana, we had overheating issues which would boil away 4 litres of coolant every 10km, but we knew when it was a problem as the Puma has a safety cut out if it gets too hot - the engine stops, the temperature gauge pings into the red and you coast to a halt. We made very slow progress that day, but at least we didn't have a cooked engine. But that's a story for another day...


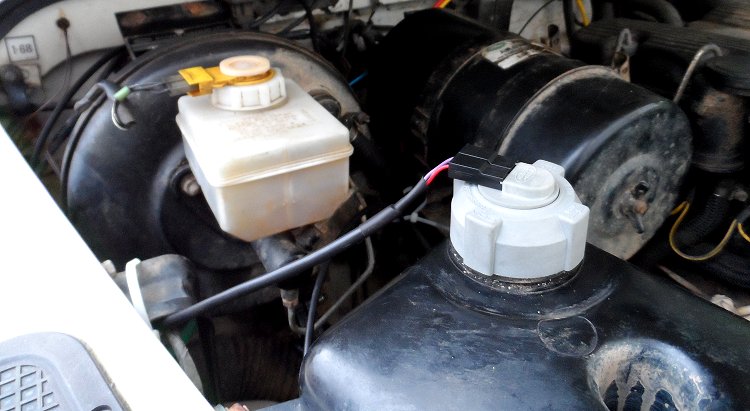
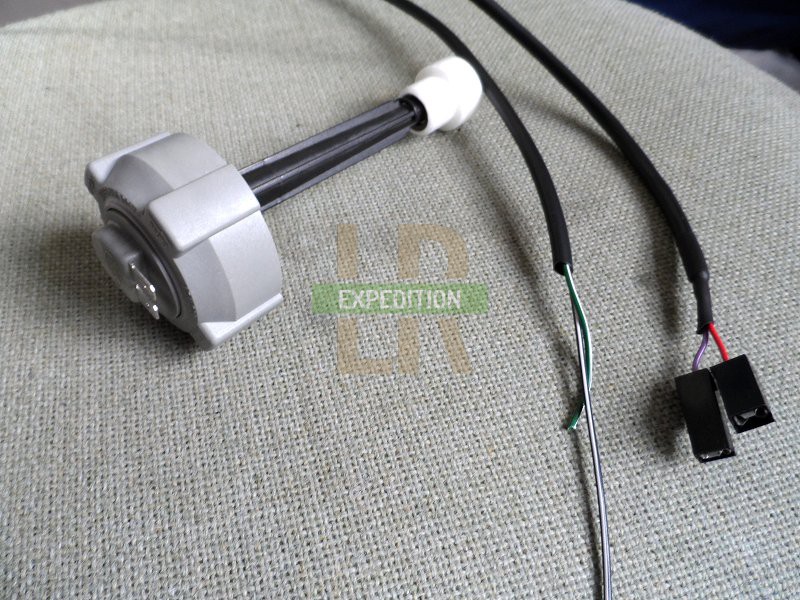
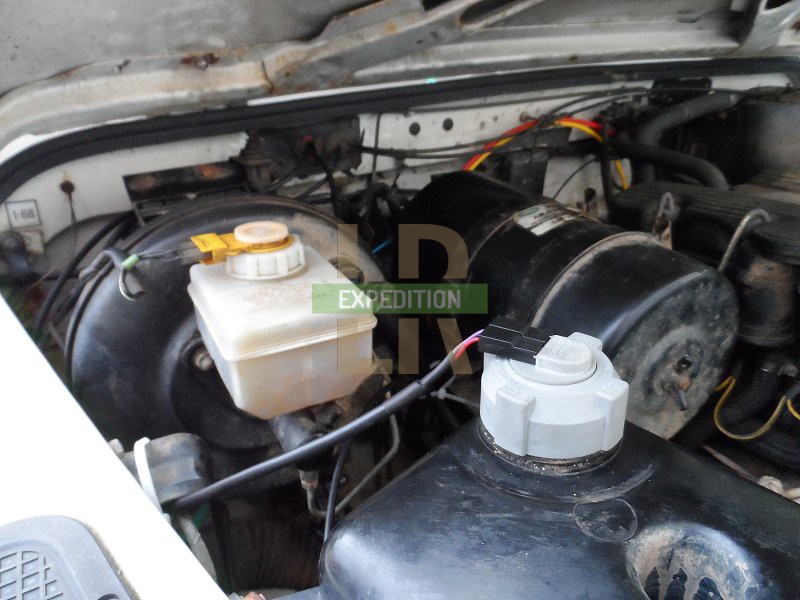
Not wanting my preferred 300Tdi to be outsmarted by the more modern Tdci, and with coolant loss a very real threat, I wanted to fit a gauge that would mitigate the issues of having a low coolant level. Using a coolant reservoir cap from a Range Rover with an inbuilt float switch, we can create an alarm that we can wire up to a dashboard warning light that lets us know if the coolant level drops before it becomes a bigger problem.
How to get a low coolant alarm
There is no off the shelf solution for the 300Tdi. Using the handy reservoir cap from a Range Rover helps, but its alarm is driven by its ECU. Wiring a Range Rover ECU into a Defender is not really worth it. There are a few options available:
- You could fit this radiator sensor. Installation instructons here
- Drill and tap the reservoir with a bespoke level sensor
- Fit the Range Rover cap and this module
There are other solutions that people have done, but these are the main three. No.1 is quite expensive, No.2 requires some modifications, No.3 was a plug and play solution and genuine Land Rover. I went for this.
The real magic happens in the "module" or little black box. There was someone who used to make them on the Difflock forum but this has since expired. The key to this whole system are the electronics required to signal that the coolant is low.
I didn't want alarms, test buttons and random LEDs. I just wanted a light to appear on the dashboard warning lights when there was a problem with the coolant level, and to fail safe so that any wiring problem would show false positive. As there was no solution for the module that could be purchased, I took the opportunity to learn a bit about the dark art of electronics. I wanted to keep it as simple as possible and found the following main wiring diagrams:
- Warning light and buzzer
- Relays only (Site has since disappeared)
The simplest I found was No.2 from StoneFisk.com. I couldn't work out the difference between the two wiring diagrams, one with a transistor and one with a transistor and relay. The relay option seemed most applicable to my non-electronic mind as able to cope with some higher current, so I opted for No. 2.
Designing my own
I didn't want a buzzer. I was happy enough with a warning light. As it would fail safe, I didn't want a test button either. I wanted to keep it as simple as possible (always a good expedition philosophy) by using the unused "Water in filter" lamp on my Td5 dashboard warning lights. The only issue was that the Stonefisk.com diagram switched a positive feed, whereas this warning light is switched by an earth connection. A little fiddling with the wiring diagram and I came out with this:

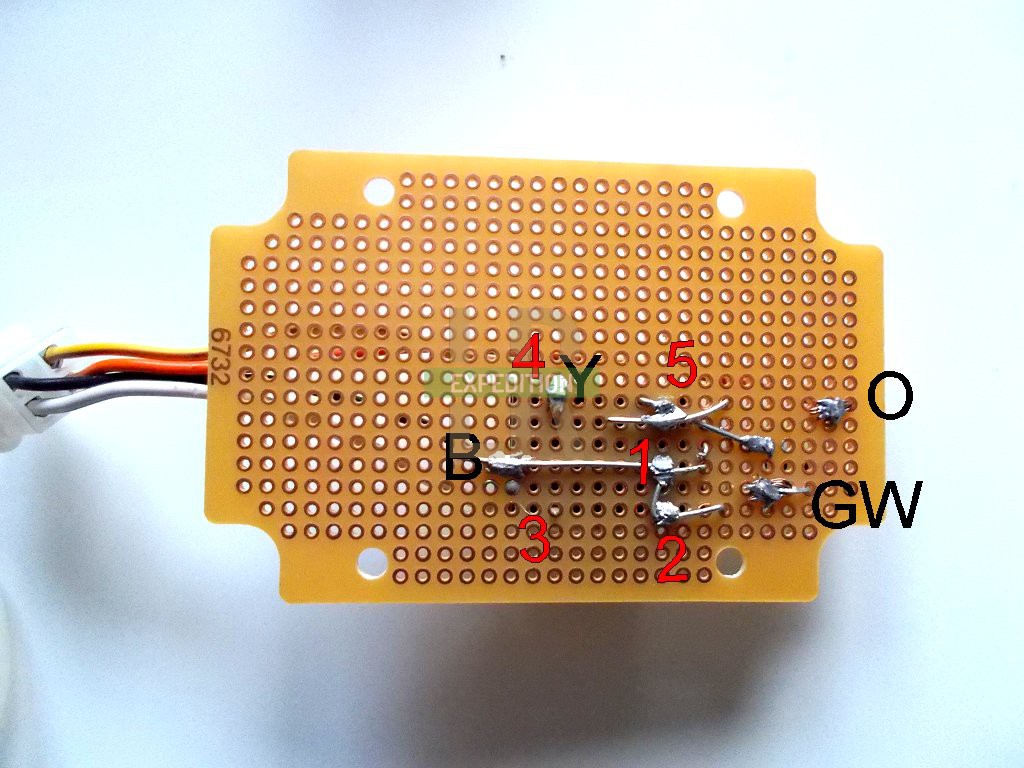
The Omron G5LE-1 relay has connections numbered 1-5. They are wired:
- Ignition
- Earth
- Nowhere
- Warning light
- Transistor
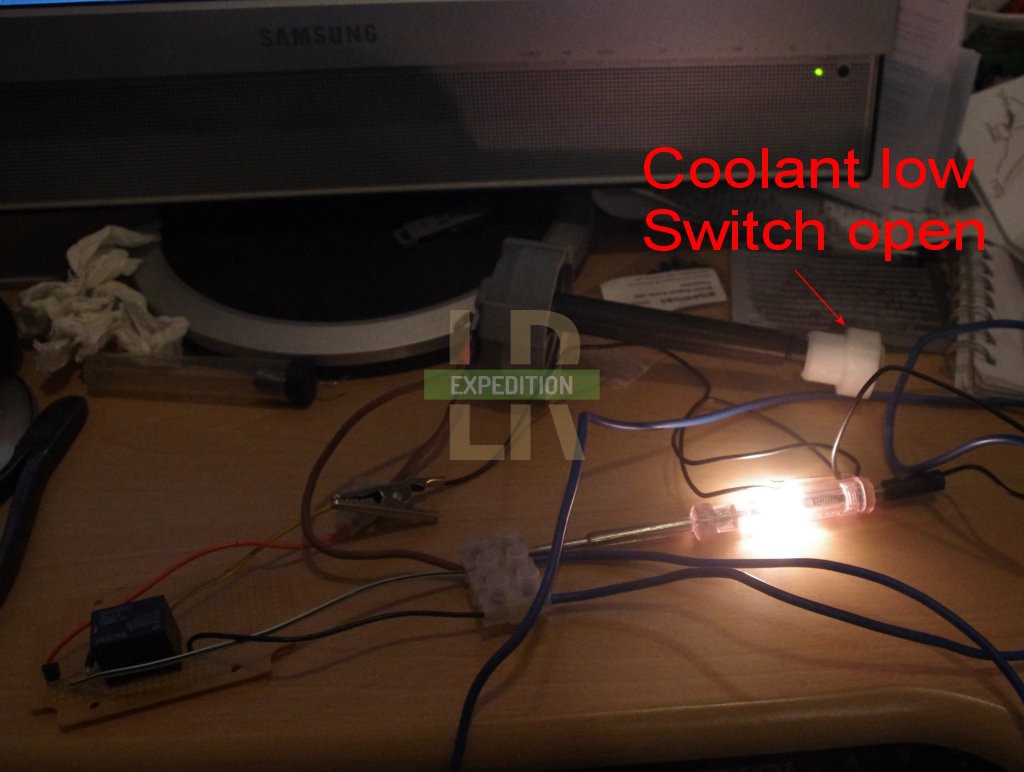
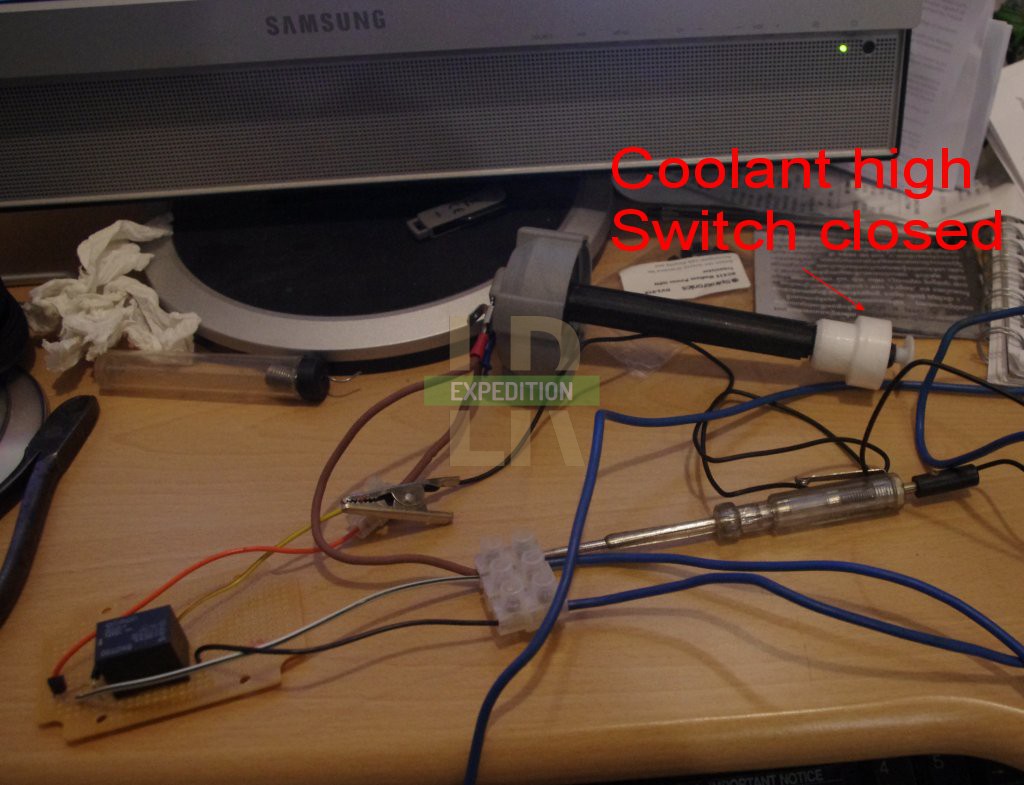
The warning light is normally in the "on" position. When the ignition turns on and the coolant level is high, the coolant sensor switch is closed and sends current to the relay which turns the warning light "off". (There will be a flicker of the warning light when the ignition feed initially goes on). If the coolant is low, the sensor switch is open so no current passes to the relay coil and the light returns to the default "on" state. By doing it this way it is failsafe by having a high coolant level keeping the light off, rather than a low coolant level turning the light on. It means the light would also turn on if the switch or wiring was broken.
The transistor is required because the sensor switch has a high resistance, so we use the transistor to make the switch route the ignition feed otherwise the current would always follow the path of least resistance. The diode is required to stop any reverse voltage spikes from the relay damaging the transistor.
What you'll need
- PRC7925 - Range Rover reservoir cap with coolant sensor
- Electronic project box with PCB board (eBay link)
- Omron G5LE-1 micro relay (eBay link)
- BC635 NPN transistor (eBay link)
- 1N4001 protective diode (eBay link)
- A selection of wiring
- Spade connectors for the reservoir cap and connecting to the loom
- Inline fuse holder
- 4-way connector (to be able to remove the module)
- Wiring sheath or convoluted tubing
What to do
First of all I made the module so that it can be tested on the bench. This was a whole new world to me so I had to learn as I went. There are lots of resources online on how to make up circuit boards. Follow the wiring diagram to make your own kind of box.
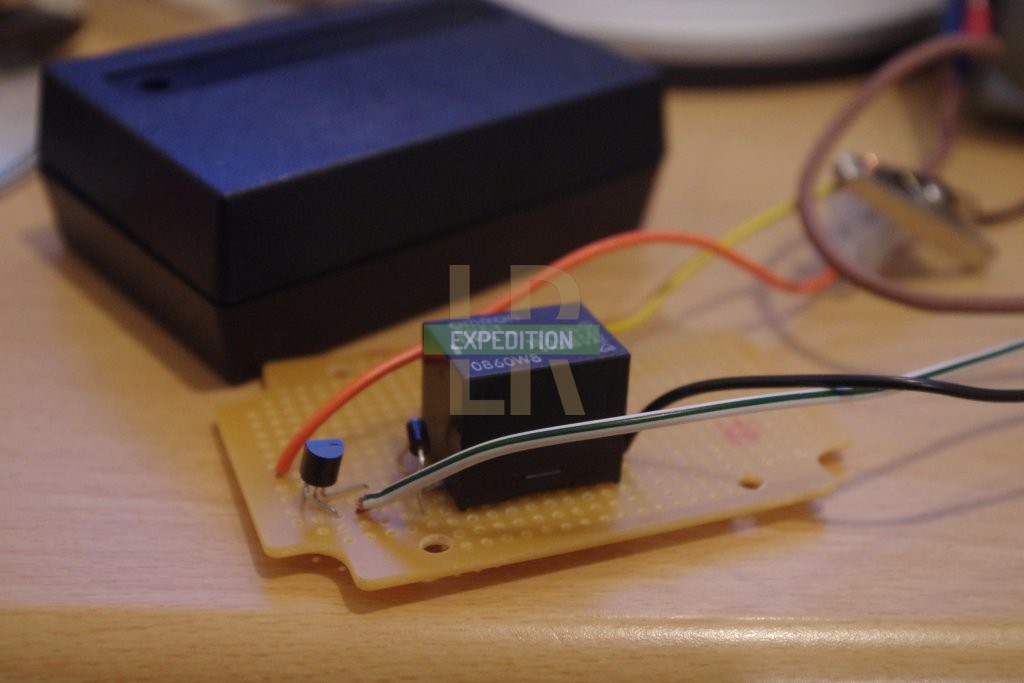
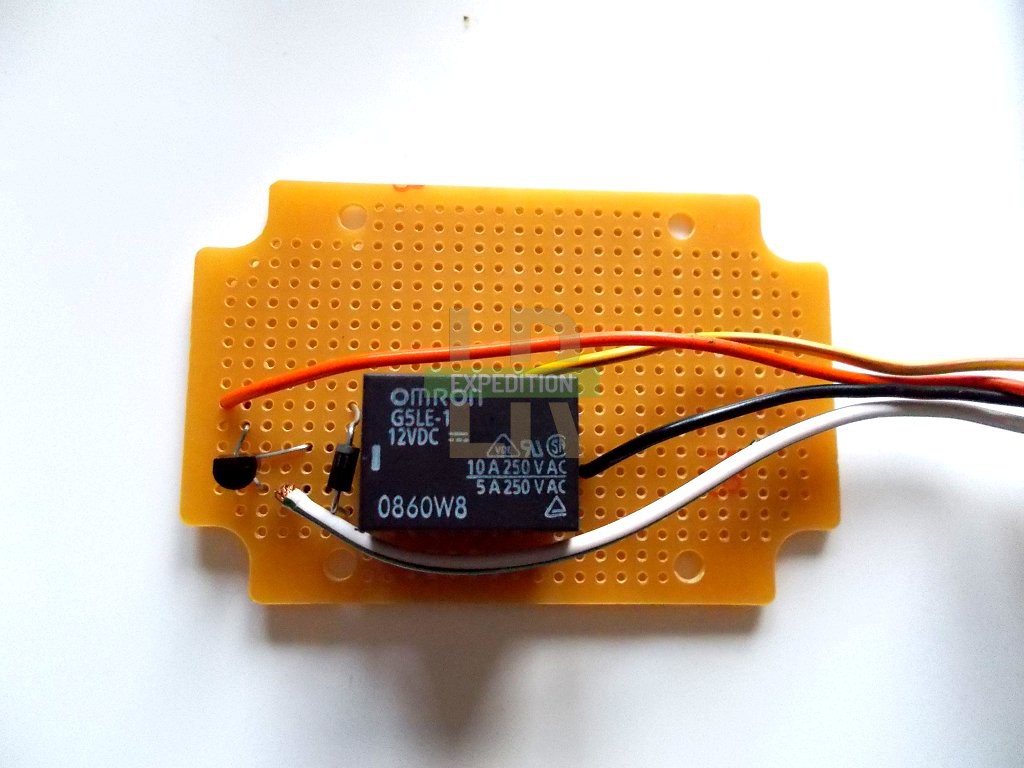
I then wired up the components on the bench to test that it all worked. My soldering isn't great. I don't know how, but it worked first time!
Once you're happy it's working, make a loom of two wires to go from the sensor to the dashboard. A metre will be enough. Then fit the reservoir cap and route the loom into the dash area.

Attach the 4 way connector to the 4 wires coming from the module so that it can be easily removed in the future. Keep the 4 wires on the other side long enough so they can be cut to size depending on the module's position. I used random bits of wire I had lying around so the wire colours are not totally consistent, but I do have a record of what colours are used where. Seeing as this is a non-standard install, you could just make them up.

If it's not already wired in, add a wire to the appropriate warning light. In this case I used the "Water in filter" light on the 16way plug on pin 4.

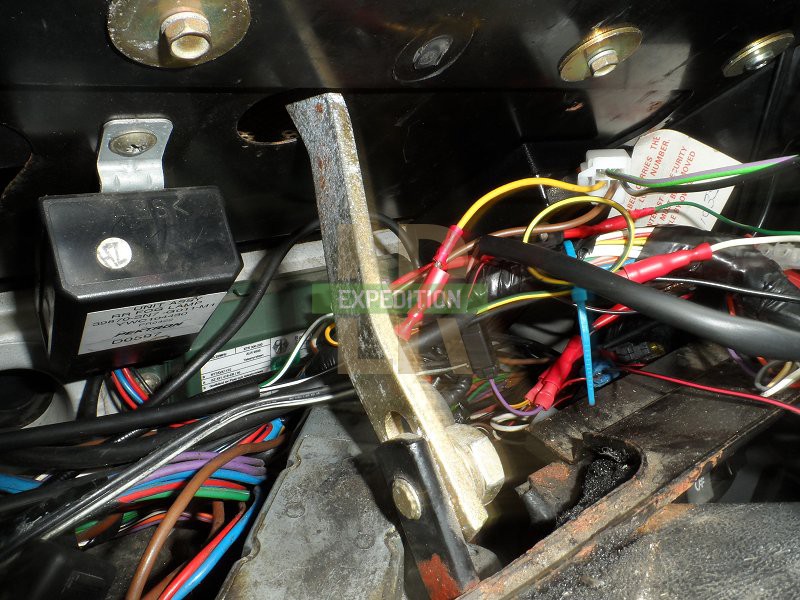
And then join it all together like the wiring diagram. It's a bit fiddly and takes a bit of time to route the wiring and find the appropriate feeds. I put connectors between each section of wiring, so that I could remove each bit individually (fuse holder, module, sensor loom). I positioned the module on the far right and stuck it to the backing plate with a 3M adhesive pad. You can just see it at the back on the right. The two wires coming left attach to an ignition source (which also joins the sensor IGN feed) and the yellow wire for the sensor switched feed. The black and green/purple wires go to the right to earth and the warning light.
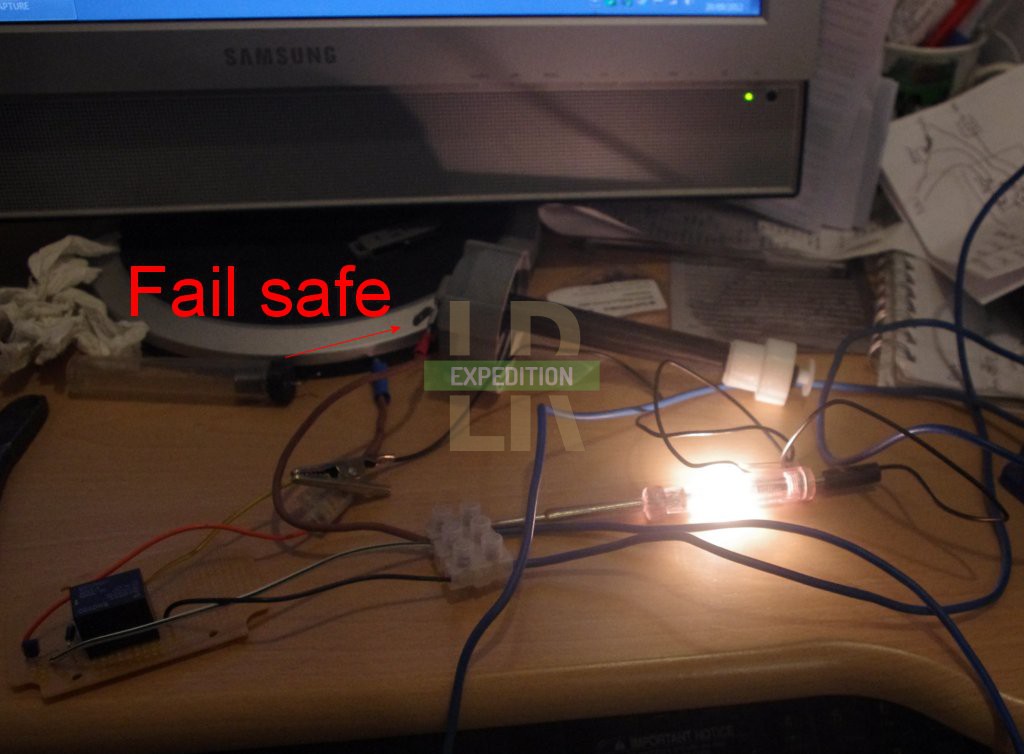
The moment of truth - testing. When the ignition goes on, there is a brief flicker of the light as the module's relay engages once it knows that the level is high enough. Lifting the sensor out of the coolant or removing one of the wires should make the warning light come on.


It's really quite cool and i'm amazed it all worked first time knowing how much of a brain freeze the electronics had on me. I can't really take any credit for the methods shown here as this modification has been done a lot - i've just aggregated what i've learnt and applied my own method. What I did try to do though was make it as simple as possible without having to buy some expensive and non-standard off the shelf solution. Here's hoping I never see that light again...